

I love photo books for archiving our family memories. I love photo prints on my walls, but there is only so much room in our home. Printed photo books are a great way to get a lot more images off of my hard drive and into my family’s hands to enjoy. I’ve tried all kinds of photo book services and I use different ones for different purposes, but today I am focusing on quick and easy photo books.
I always have plans to do giant, all-inclusive photo albums for each year for our family. I have grand plans to include lots of words & captions, telling about all of our adventures and writing about what the kids were like that year. The problem is that I take a million photos. This process is so overwhelming that I am YEARS behind.
A couple years ago, I found a way to make myself feel a little better about being so behind in creating my giant photo books. I began to do a quick and easy photo book of just my top 100 or so personal photos from that year. Forcing myself to stick to 100 or so photos ensures that I don’t spend hours and hours on the book. I quickly pick only my very favorites from the year. And I have chosen the easiest photo creation service I’ve found so far to print the book. I can do the entire thing in less than an hour. This way, I know I have my best of the best printed and I don’t feel so frustrated with myself about not having done the full monty photo book since like 2012. One day I’ll finish them all. Goals right?
So let’s get you started on doing a quickie book of your own.
Step 1: Gather all your 2020 photos into one place
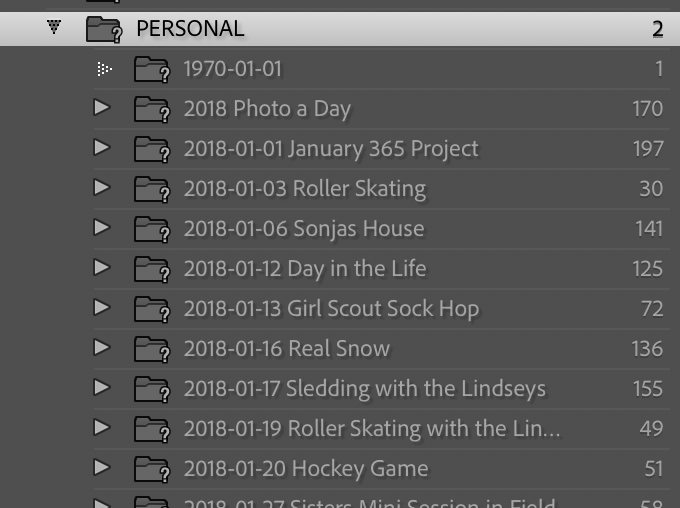
This step will vary depending on what you use for your photo organization system and what software you use for organizing your photos. I use Lightroom to organize my photos. My photos are organized into folders by year, then I have a folder for each event with the date and description as the folder title. I label them with the year, then the month, then day first so they sort easily.
Whatever organization system you use, make sure you have all your images together. For me, this means going to Google Photos where all my phone pics are stored and downloading those to add to lightroom. But you can also do the opposite – upload all your photos to Google and create your collection from there. Lightroom lets me easily add photos to a saved collection and keep them all in their original folders. Your software may do this too. Or you can use Google Photos. The bottom line is to make sure you have all your photos for the year in one place so you can quickly and easily go through them all.
Step 2: Choose only the very best for your Photo Book – keep it to around 100 images
This is the hardest and most important step. Now you will go through all your photos from the year, and very quickly select your most favorite images. How you do this will depend on your organization method. You can either add them to a collection, add them to a separate album in Google Photos, or copy and paste them into a specific folder on your hard drive.
Be brutal when making selections. Remember you are aiming for only around 100 images for the entire year. This means for each event, like a birthday party, etc, you will only choose the best one or two photos that you really love. Be quick and don’t think too much about it. If you have to consider one photo for too long, it probably isn’t one of your favorites so let it go.
You’ll probably have to make more than one pass at this. I usually end up with too many photos and have to cull it down more. Viewing them as a collection helps me really see the keepers and the ones that don’t make the cut.
I have several reasons for choosing photos for this collection. Some are my favorites because they are really good photos that I’m proud of sharing. Others just really represent the year and our lives at the time. (For example, see the phone shot below of the empty toilet paper shelves at the grocery store. It’s not a beautiful photo but it’s so 2020 that I kept it. It brings back memories of what the felt like.)
Step 3: Upload your chosen photos to an album in Google Photos
This is super easy. Of course, I’m making the assumption that you already have a Google account. If you don’t, then I’m not sure how you function and I have a lot of questions. So anyway, you log into Google, go to Google Photos, and click “Create Album”. I named mine “2020 Top Personal Photos” but you do you. Once you’ve created the album, click the upload button and upload your chosen images from wherever you saved them on your hard drive.

Step 4: Create & Purchase your Photo Book
Once your pictures are uploaded into the Google Album you created, go into that album and click the little shopping cart button at the top right side of the page. Then choose the “Photo Book” option. That’s when the magic happens. Google creates the book for you, auto-filled with your images and with the title you gave for the Album as the title for the Photo Book.

It seriously does everything for you. This is why I chose this as the quick and easy option. Seriously, I have spent many hours of my life designing Shutterfly Photo Albums, adding digital stickers and deciding on favorite layouts and cutsie backgrounds. This is not what we are doing today. We are getting one image per page, with a simple but elegant layout on a white background. You can make changes to what Google made if you like, but it seemed to put the photos in chronological order, which was fine with me. Usually I might change the cover photo and that’s about it.
When your book is the way you want it, click the “Next” button on the top right hand corner.

I chose the Soft Cover option because with my goal of quick and easy, I also added inexpensive. I also very much value high end photo albums, but I save those for my family photo sessions I do each year. If you’d like me to design one of thoses for you after a portrait session with me, let me know.
So chooses your option, pay for your book in the normal Google ways, an wait for it to arrive. Easy peasy.
My Photo Book
Here is a look at my 2020 book. Even though it was the craziest, most messed-up year ever, I’m still grateful for the time I was able to spend with my family. I’m so glad that I have these images in hand to enjoy for years to come. Hopefully, I’ll soon catch up on all my full-size family photo albums. But in the meantime, I have this one of all the best of the best, and it took less than an hour.

A Note About Google Photos
I just wanted to note that I also add a more comprehensive collection of personal photos to Google than just my top 100. The photos I take on my phone automatically are added to my google photos, but I also add most of my personal photos that I take with my big girl camera. I do this for a few reasons. First, it’s an easy backup for my personal pics (though I also generally keep copies on two different hard drives.) Second, it’s super convenient to always have those photos with me on my phone or whatever when I need them, in a way that’s easy to share with friends and family. Third, I love the AI search capabilities. If it’s a friend’s birthday, I can search for pictures of them to share in a post. I can search for “Valentine” and see all the photos through the years of my kids in their Valentine cuteness. Viewing past memories of what happened on today’s date is super easy too.
I highly encourage you to use Google Photos, or some sort of cloud-based backup (I know some people use Amazon photos) to store your personal images. The worst thing is to lose those images, so keep them safe and easy to enjoy.
I am now booking Spring Family Portrait sessions, or as you can see above, am happy to book you now for a winter photo session. See my website for more information or to book a session from my online calendar. I would love it if you would consider following me on Facebook and/or Instagram.